In large industrial systems like DCS or SCADA environments, OPC servers can contain tens of thousands of tags. While it may seem convenient to expose all these tags through the OPC UA Wrapper, doing so often leads to serious challenges.
End users, engineers and system integrators frequently struggle with “data overload” when browsing or connecting to the address space. Not only does this slow down the system, but it also increases the risk of exposing sensitive operational data that are, in most cases, not needed by the OPC UA Client application.
This blog explains why limiting OPC UA tags is crucial, what happens when this problem is ignored, and how to implement a solution that improves performance, security, and overall manageability.
Impact of Exposing All OPC UA Tags
Exposing every tag from your OPC server via the wrapper can have multiple consequences:
- Performance Issues: Large address spaces consume more memory and CPU resources. Browsing, reading, and writing data slows down both the source OPC Server and connected clients, which can impact real-time monitoring and decision-making.
- Security Risks: Every exposed tag is a potential attack surface. Unnecessary access to sensitive operational data increases the chance of data breaches or accidental misuse.
- Operational Complexity: Engineers must navigate massive, unorganized address spaces, making it harder to find the tags that actually matter for monitoring, reporting, or integration.
- Migration Challenges: For organizations moving from OPC Classic to OPC UA, carrying over all tags without selection can overload the system and complicate the transition.
In short, exposing all tags is inefficient, risky, and makes the system harder to manage. The real solution is to expose only the OPC tags that are necessary for operations and the end business application.
Limiting OPC UA Tags via CSV Files
The solution is simple but powerful: define exactly which OPC UA tags should be exposed by the OPC UA Wrapper using a CSV file.
By limiting the exposed tags, you:
- Control the address space and avoid unnecessary data overload.
- Reduce CPU and memory usage, improving performance for the source OPC Server, OPC UA clients and the Wrapper server.
- Protect sensitive operational data by showing only what’s required and isolate further legacy OPC Servers data.
- Simplify maintenance and scalability as the system grows.
This approach is especially useful during OPC Classic to OPC UA migrations, allowing a smooth, controlled, and secure transition.
How to Configure: Tutorial – Creating Address Space from CSV Files in OPC UA Wrapper
This section explains how to configure the Wrapper, create the address space of your OPC UA Server using a CSV file, and import the selected tags to build a clear and well-organized Address Space. Each tag in the CSV file is identified by its Item ID, matching the existing Item IDs in your source OPC Classic Server.
1- Add a new OPC UA Wrapper Service
- Right-click on the OPC UA Wrapper shortcut from your desktop, or from the path: “Start → Programs → Integration Objects → OPC UA Wrapper → OPC UA Wrapper”. Then, select “Run as administrator” from the displayed menu.
The OPC UA Wrapper main interface will then be prompted.
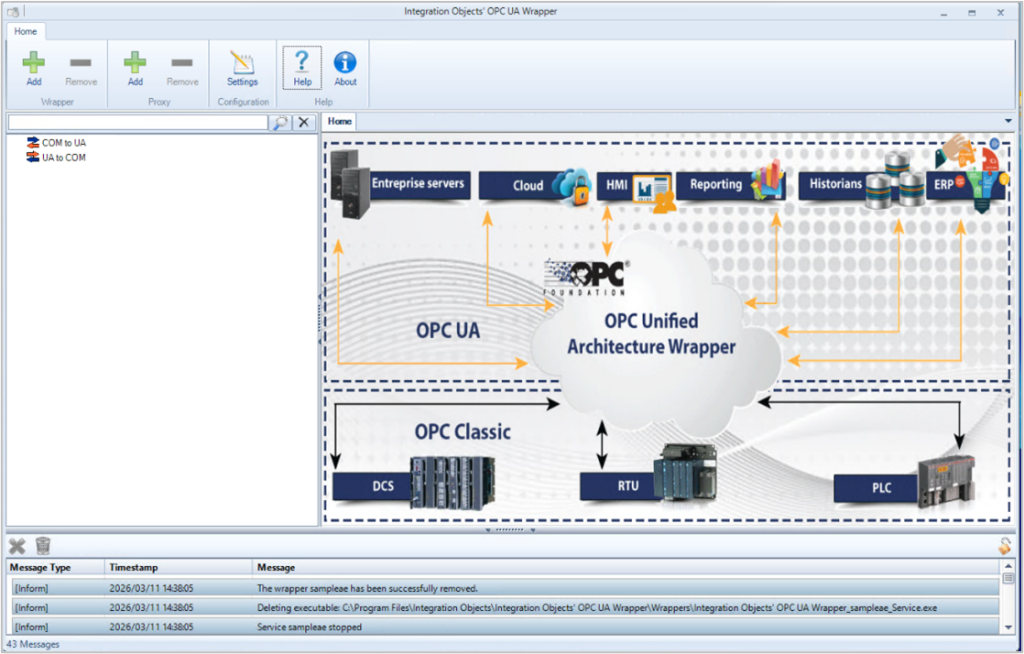
OPC UA Wrapper Configuration Tool
- Right-click the COM to UA root node and select Add Wrapper, as shown below
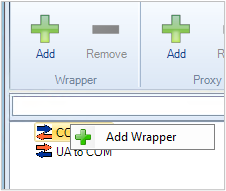
OPC UA Wrapper: COM to UA
- Configure the new Wrapper Service by specifying the Name, HTTPS port, and TCP port numbers used for Wrapper/Client communication.
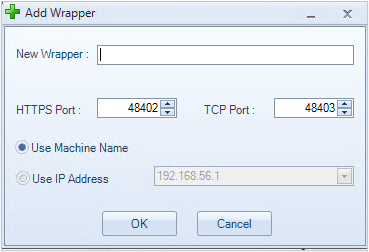
OPC UA Wrapper Configuration
- Click OK. A new Wrapper Service will be added to the Wrapper List, as shown below.
New OPC UA Service
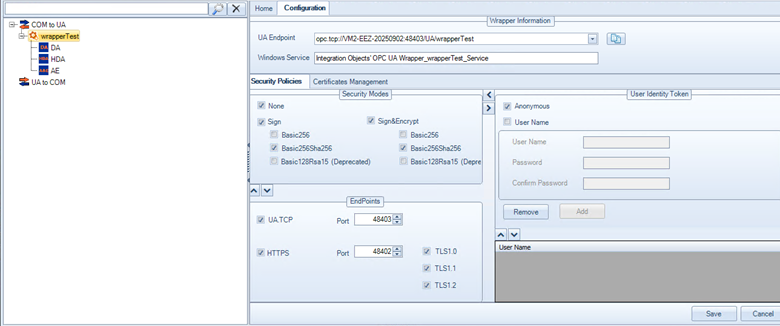
Note: You can configure additional advanced settings for the new Wrapper Service, such as Security Policies, User Identity Tokens, and Endpoint parameters.
- Right-click the Wrapper node and select Add Servers.
- Select one or more servers (DA or HDA) available on the local machine, or manually configure a remote OPC server by entering the OPC server name, the IP address, and selecting the OPC server type (DA, HDA), as shown in the figure above.
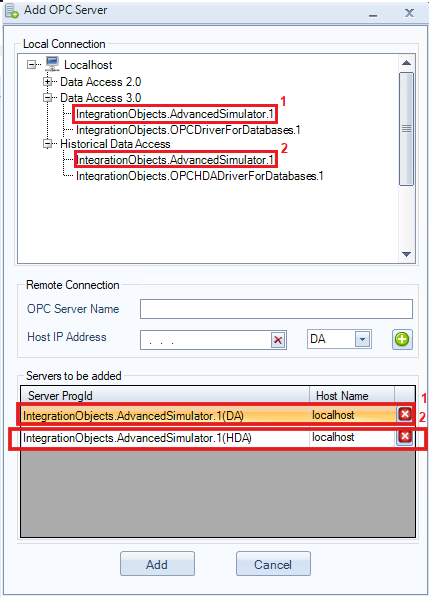
OPC UA advanced configuration
By clicking Add, the selected servers will be added according to their respective features (DA, HDA, and AE).
2- Configure the OPC UA Wrapper Service Logon
To fully manage and configure the newly added Wrapper Service, you must configure the user log on of the wrapper service to specify a user account allowed to connect to your OPC Classic Server and read data..
- Go to Windows Services.
- Locate the newly added OPC UA Wrapper Service in the list of services.
- Right-click on the service and select Properties.
- Go to the Log On
- Select This account, enter the user account, and click Apply then OK.
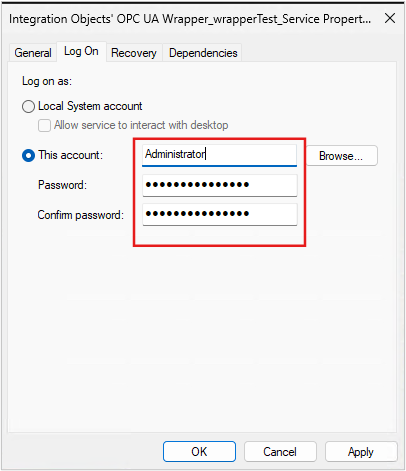
OPC UA Wrapper Service Logon
3 – Define the new Address Space in a CSV file:
- Make sure to prepare a list with the correct Item IDs that you need read from your OPC Classic Server.
- Create a new CSV file and name it as “OPCUACSV”.
- Add the list of Item IDs using the Full Path of the OPC tag. Make sure to follow the CSV file format illustrated in the example below:
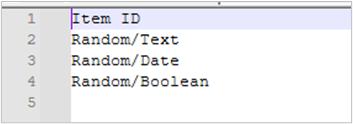
OPC UA Wrapper Address Space Example
- Save the new OPCUACSV file in your machine.
4- Import the CSV file into the OPC UA Wrapper.
- Right-click on the previously configured Wrapper and select Settings from the display menu:
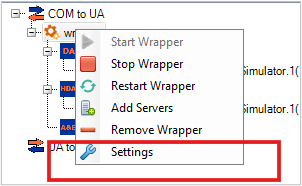
OPC UA Wrapper Settings
- Check the “Create at Start-up from CSV Files” option.
- To import DA tags, click the “…” button next to the “DA file Path” field and select the configured “CSV” file.
- To import HDA tags, click the “…” button next to the “HDA file Path” field and select the “CSV” file.
- From Separator field, add the wrapper separator “/” which may also match the classic server separator.
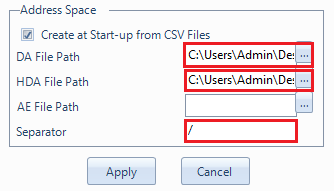
Import the Address Space CSV files
- Click
- Right-click on your wrapper and then select Start Wrapper.

Start Wrapper
5- Visualize the Configured Address Space
To visualize the new OPC UA Wrapper address space, connect the configured Wrapper using an as illustrated below:
- For DA tags:
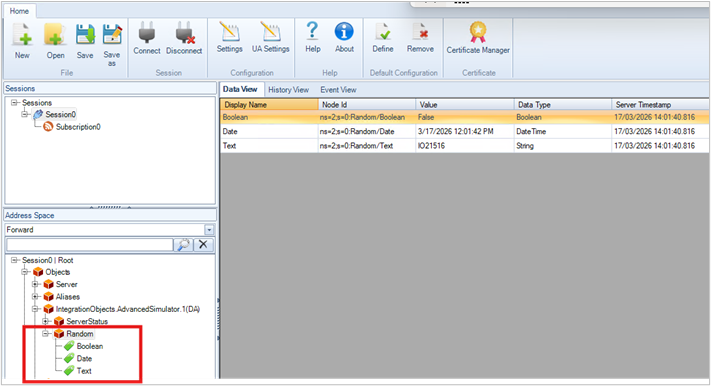
Address Space Visualization – DA tags
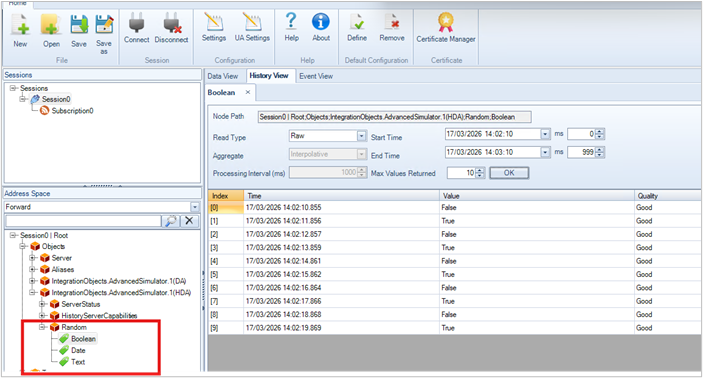
For HDA tags:
Address Space Visualization – HDA tags
Related Resources
Enhance your OPC UA knowledge and implementation with these related resources:
- A Guide for a smooth and controlled migration from OPC Classic to OPC UA: Migrating from OPC Classic to OPC UA Seamlessly
- Learn how OPC UA Wrapper improves security and mitigates risks: From Vulnerability to Security: Addressing Legacy Protocol Risks with OPC UA Wrapper
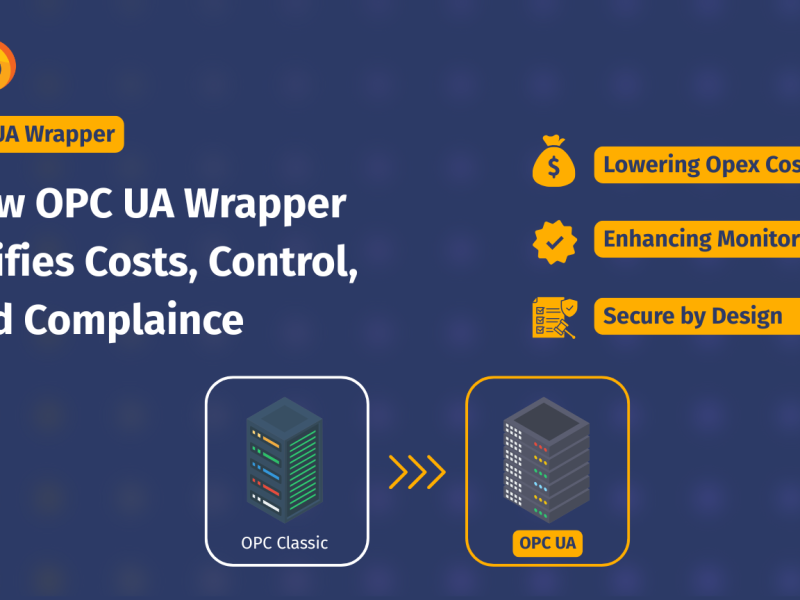
- Understand the broader business benefits of using the OPC UA Wrapper effectively: How OPC UA Wrapper Unifies Cost, Control, and Compliance
- Watch step-by-step demos of Wrapper configuration: OPC UA Wrapper Video Demos Hub
- Complete reference documentation including advanced settings, security policies, and troubleshooting tips: OPC UA Wrapper User Guide