
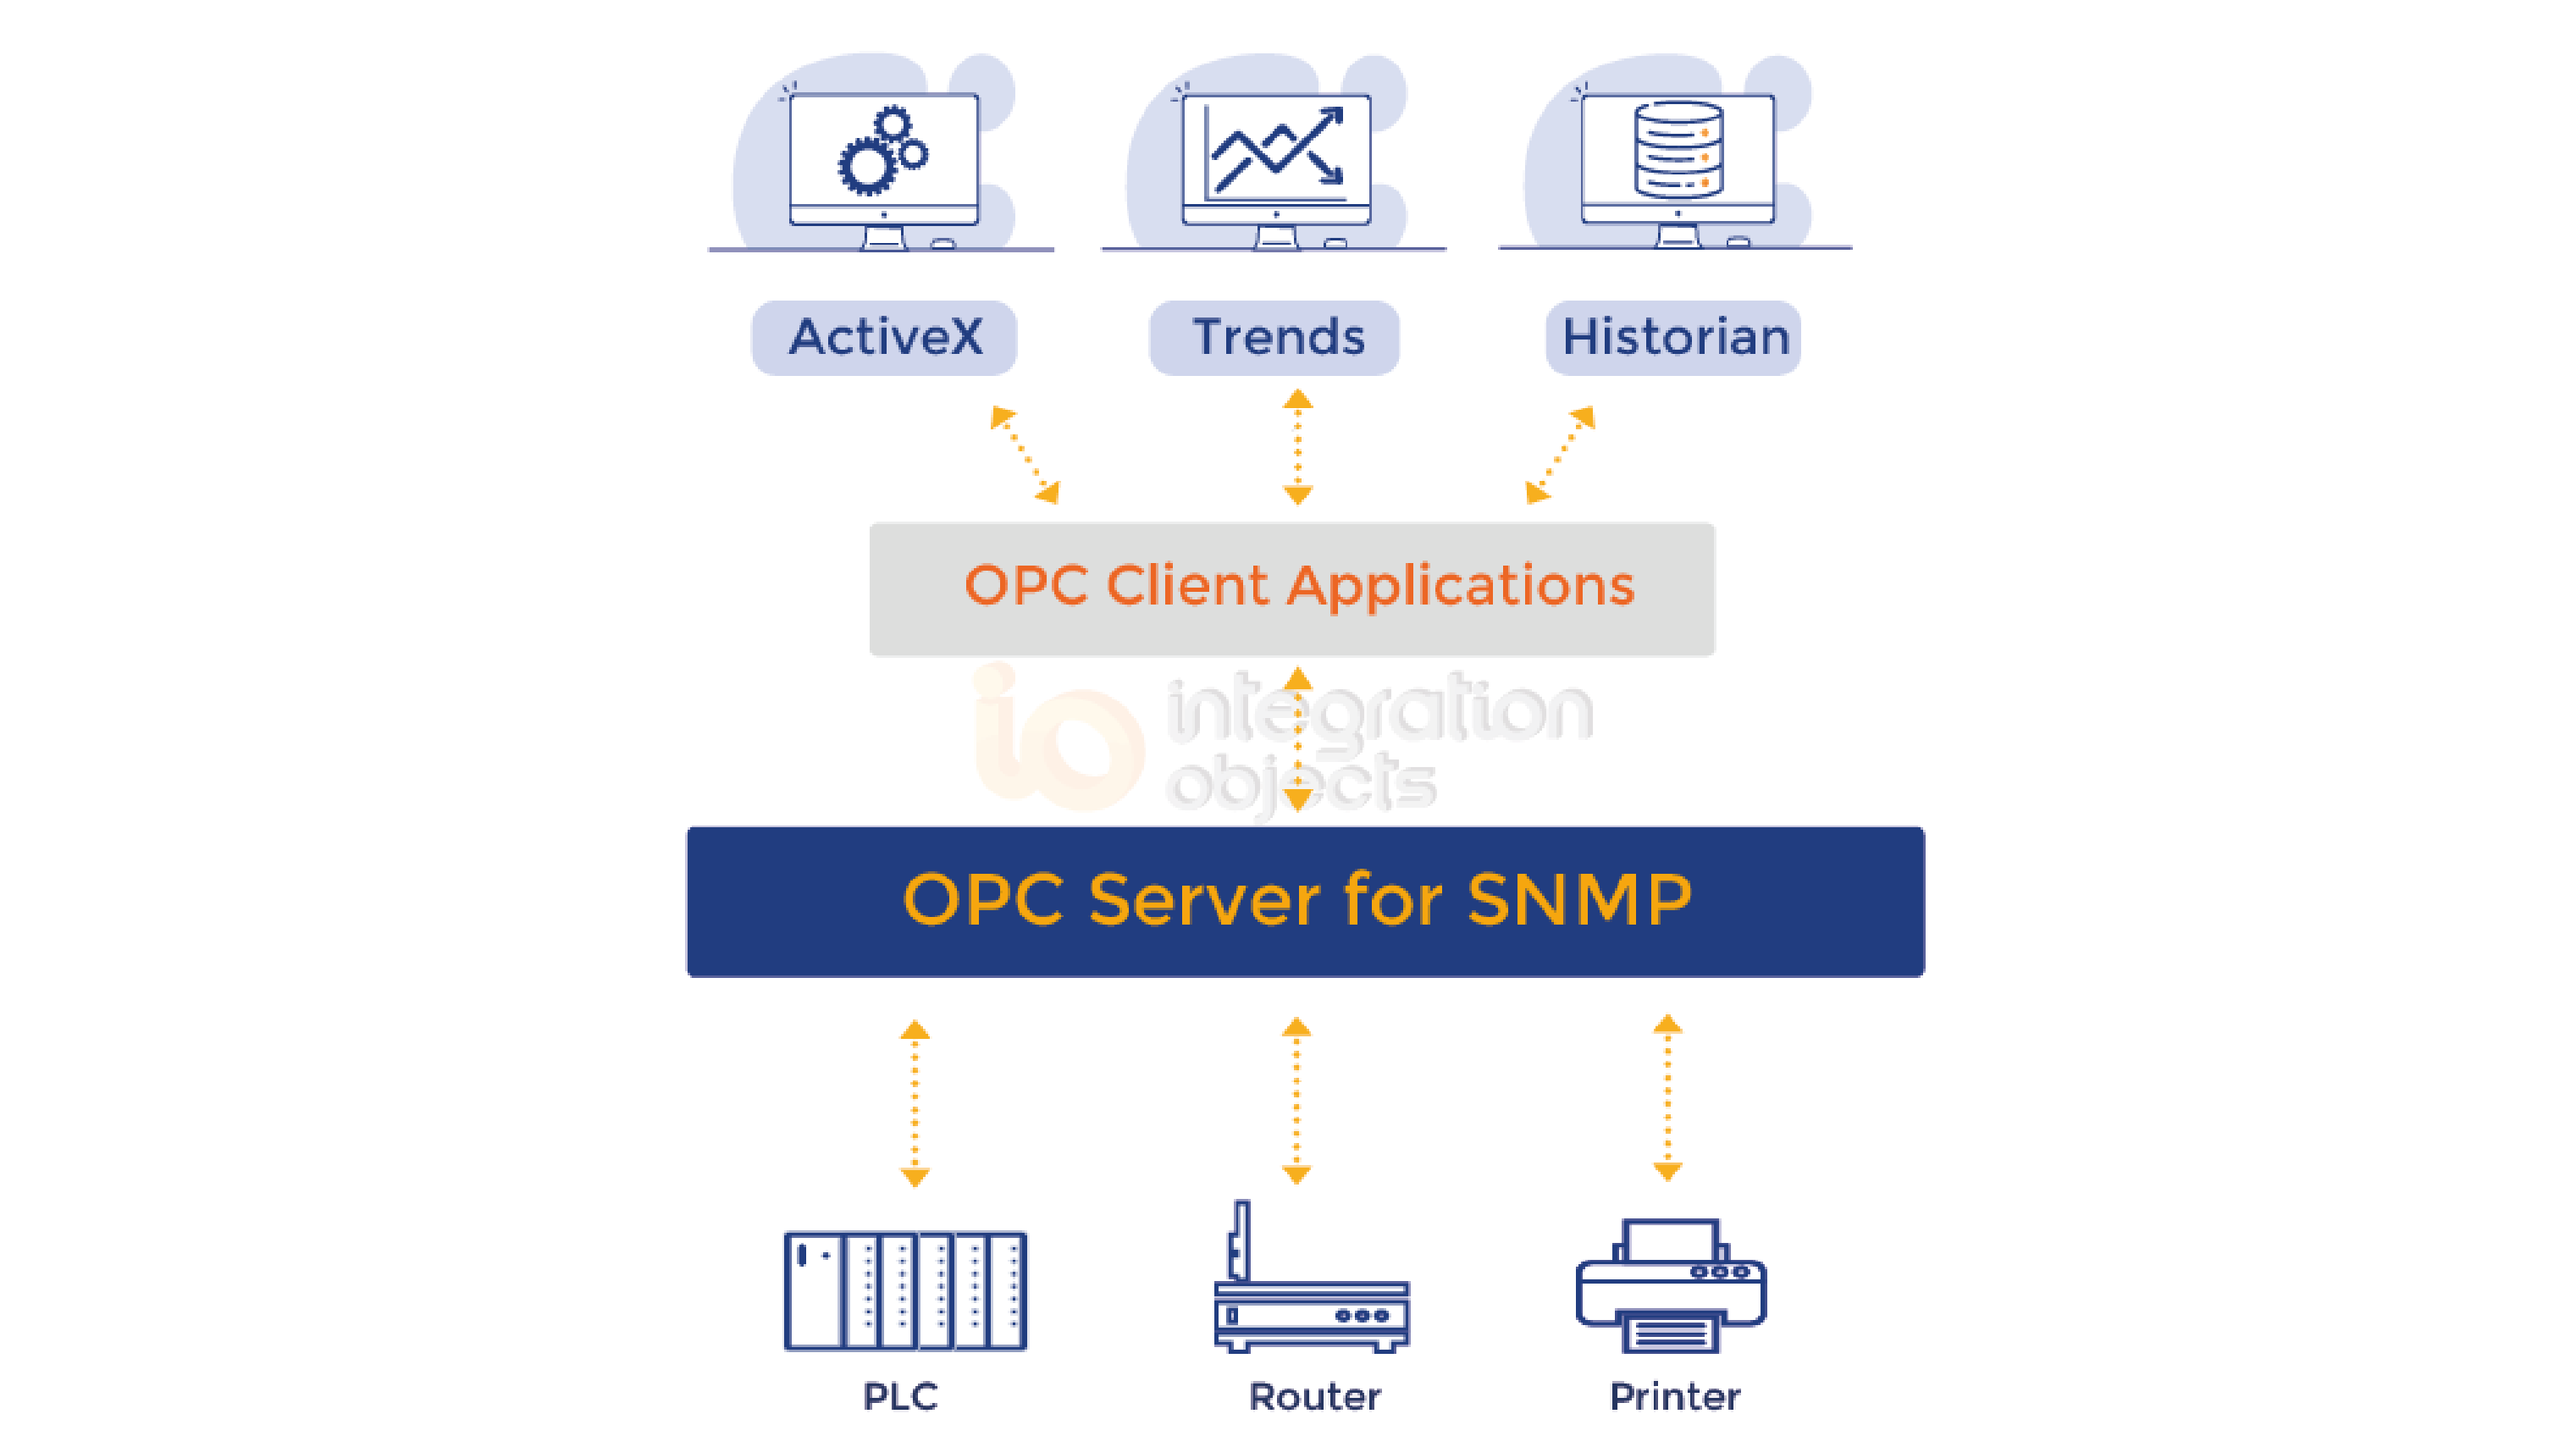
Integration Objects’ OPC Server for SNMP is an OPC Classic DA Server that offers full monitoring of SNMP enabled devices from OPC Client applications such as Historians, HMI, SCADA or distributed control systems. These devices can include workstations, servers, switches, Uninterrupted Power Supply systems (UPS), PLC, routers, etc.
The OPC Server for SNMP can be configured to get trap messages triggered by the managed devices.
What is an SNMP Trap?
An SNMP trap is a type of SNMP protocol data unit (PDU) that will allow an SNMP-enabled device to send alert messages in order to notify the manager system about an important event.
This tutorial provides a step-by-step procedure on how to configure the OPC Server for SNMP product to receive trap messages. Download OPC Server for SNMP
Configure an SNMP Enabled Device
- Download the OPC Server for SNMP from here
- Right click on the downloaded setup and select “Run as administrator” from the displayed menu. The installation wizard will then take through the different steps.
- From the start menu, right click on the “OPC Server for SNMP” shortcut and select “Run as administrator”. This will prompt the graphical user interface to configure the OPC Server for SNMP.
- Right click on the “Address Space” node and select “Add Device”, as illustrated below
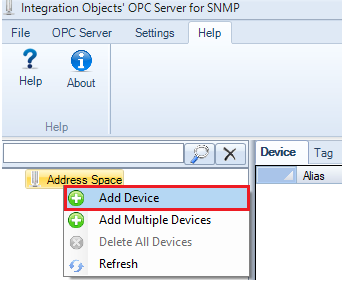
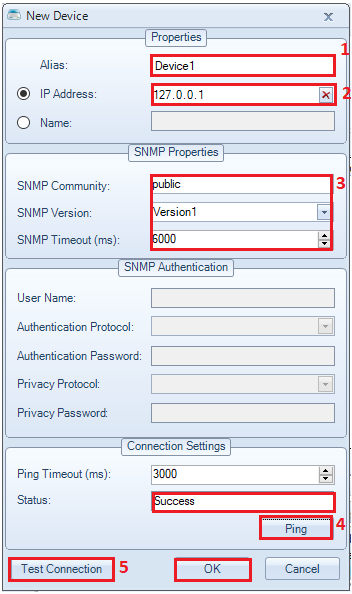
Add Device - Configure the following parameters to connect to the SNMP Device:
- The Device name.
- The Device IP Address.
- The SNMP Community type.
- The SNMP version:
- SNMP version 1 (SNMPv1)
- SNMP version 2 (SNMPv2)
- SNMP version 3 (SNMPv3)
- The SNMP Timeout
Add Device
- Click “Ping” to test the network connection to the SNMP Device and click “Test Connection” to test the communication to the SNMP Device.
Device configuration
Get SNMP Trap Messages
-
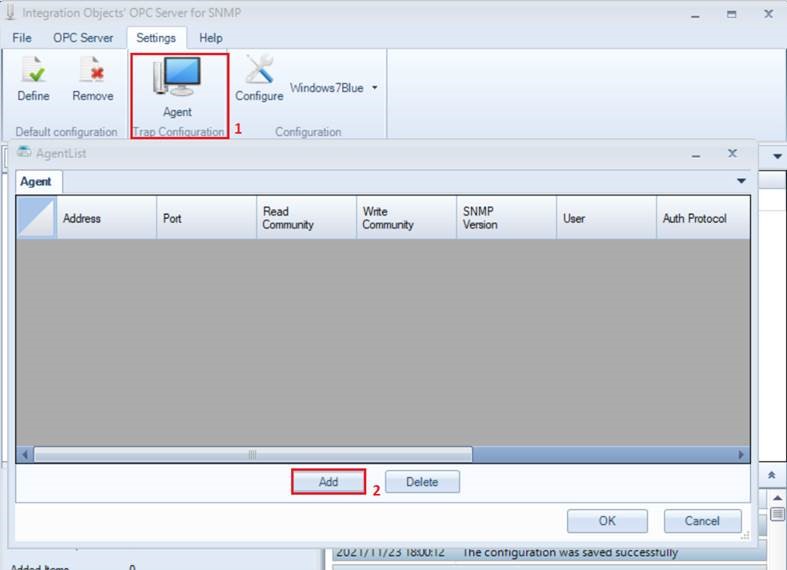
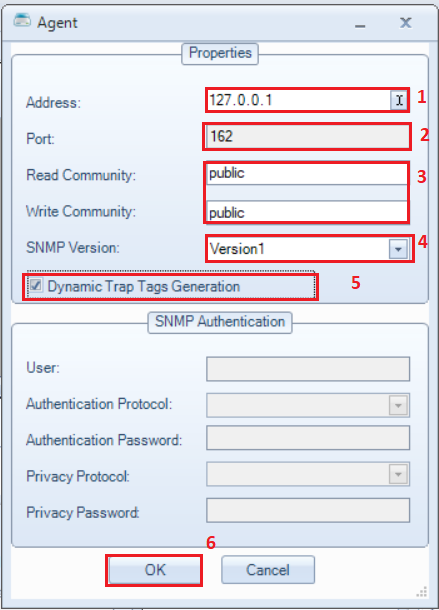
- Go to “Settings” –> “Agent”, then click “Add” button, as illustrated below:
Add Agent
- Add the following parameters from the displayed “Agent” window:
- The Device IP Address
- The SNMP trap port number. The default trap port number is “162”.
- The Read/Write Community type
- The SNMP version.
- Check “Dynamic Trap Tags Generation” option in order to get all of the variables contained in the trap message and dynamically add them to the server address space.
- Click “OK”, as illustrated below:
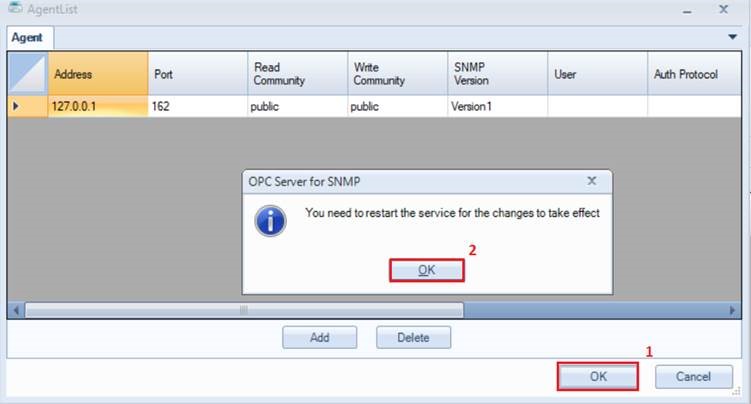
- The configured agent will be displayed in the agent list. Click “OK” button to finish the configuration. Note that you can only receive trap messages from the agent added to this list.
- A message box will be prompted to restart the OPC Server for SNMP Service as illustrated below:
Service Restart
- Save your OPC Server for SNMP configuration then restart the OPC Server for SNMP Service
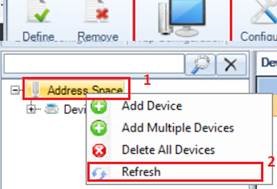
- Right-click on the “Address Space” node, then select “Refresh” button, as illustrated below:
Address Space Refresh
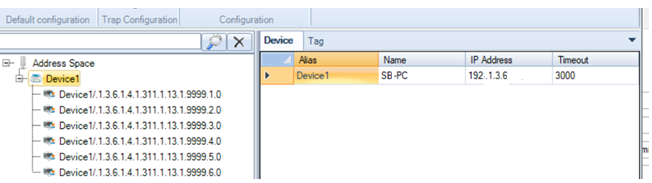
- All the available tags included in the trap messages will be automatically loaded, as illustrated in the example below:
Traps OIDs
- Connect to the OPC Server for SNMP using an OPC DA Client and read your SNMP traps messages as illustrated below.
- Go to “Settings” –> “Agent”, then click “Add” button, as illustrated below:
You may use our free OPC DA Explorer product available for download from our website.
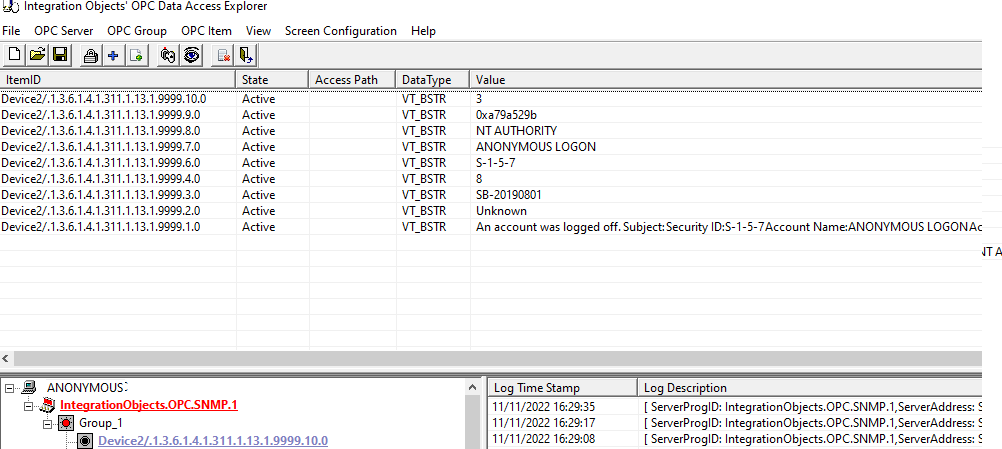

Traps Messages: Reading SNMP Traps using an OPC Client


Selection of best forex broker for successful in forex trading business is very important. Our Forex Broker Directroy helps you to choose best forex brokerage firms for forex trading in Pakistan or internationally.