Managing long and complex OPC UA node IDs can slow down operators, complicate troubleshooting, and create unnecessary friction across industrial teams. Tag aliases offer a simple but powerful solution by turning technical identifiers into clear, operator friendly names. This guide shows you exactly how to configure tag aliases in OPC UA Proxy so you can streamline navigation, improve clarity, and boost efficiency across your automation ecosystem.
Why Tag Aliases Matter
The OPC UA Proxy is a feature component of the OPC UA Wrapper. It enables communications between your OPC UA Servers and OPC Classic Clients quickly and efficiently. You can also configure aliases for the tags via CSV files. The alias will define friendly tag names of your choice and will be mapped to the original OPC UA node IDs e.g. unit/main.XXX[ns*2,s*unit/main.XXX].
This tutorial provides detailed steps how you achieve the tag aliases configuration in the OPC UA Proxy. The main steps are as follows:
- Install the OPC UA Wrapper using an administrator account. Refer here to download the product trial setup.
- Open the OPC UA Wrapper graphical user interface.
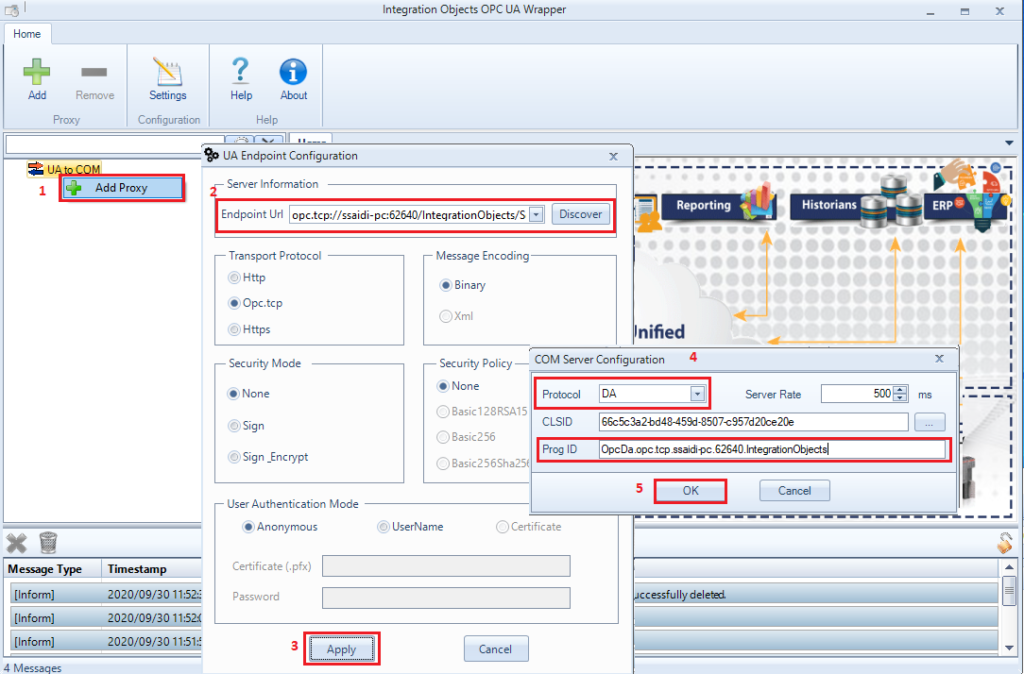
- Right click on the “UA to COM” node and then select “Add Proxy”.
- Enter the endpoint URL of your OPC UA Server then click the “Apply”
- Select the Protocol and the ProgID of the new Proxy then click the “OK” button:
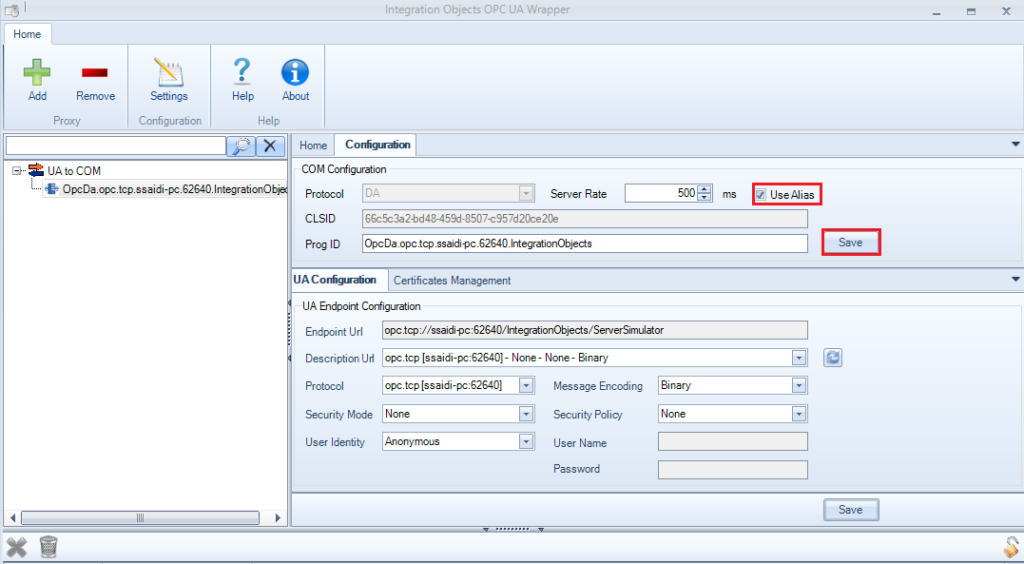
- Check the “Use Alias” option as illustrated below. Then, click the “Save” button
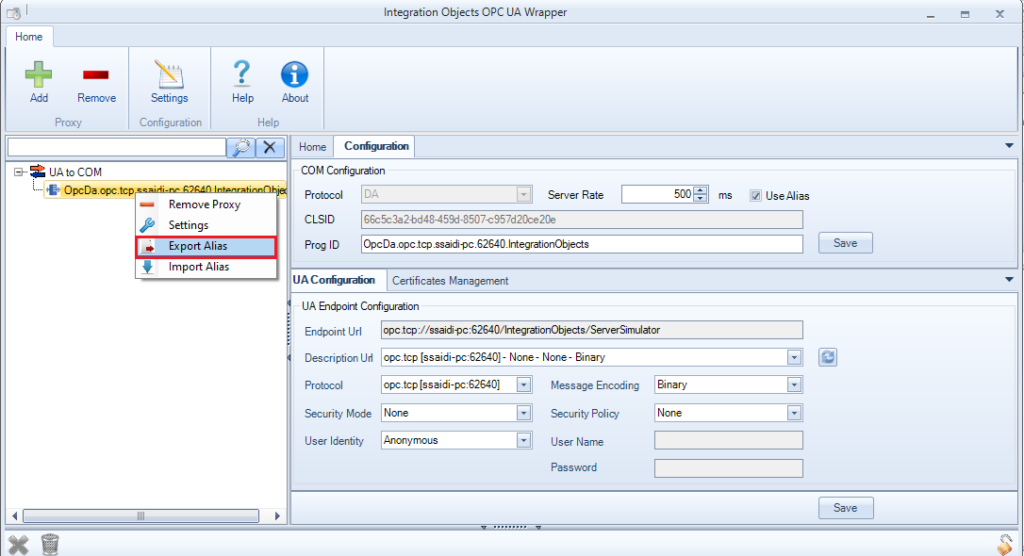
- Right click on the configured proxy, click “Export Alias” and save the CSV file.
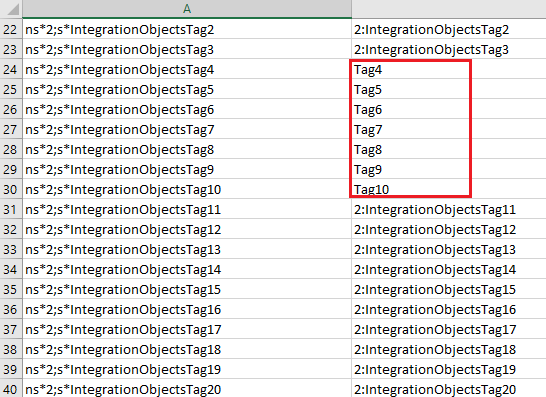
- Open the exported CSV file and modify the second column in order to set your own tag aliases. Please note that the first column must not be modified because it indicates the original OPC UA node IDs.Also, you need to configure unique alias names for your tags.
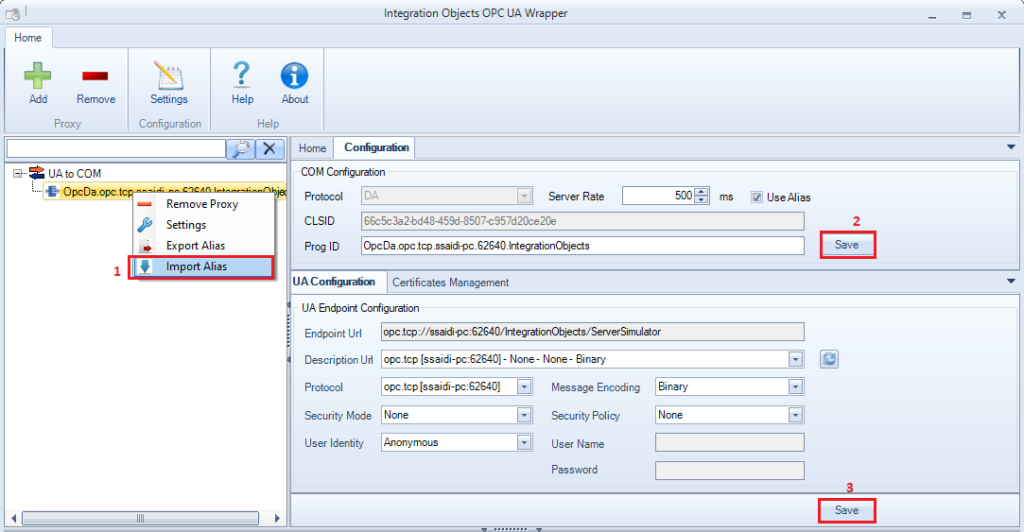
- Once you are done with your CSV file configuration, right click on the configured proxy, click “Import Alias” and choose your CSV file. Then, click the “Save” button in the COM Configuration panel and the “Save” button in the UA Configuration panel as illustrated below:
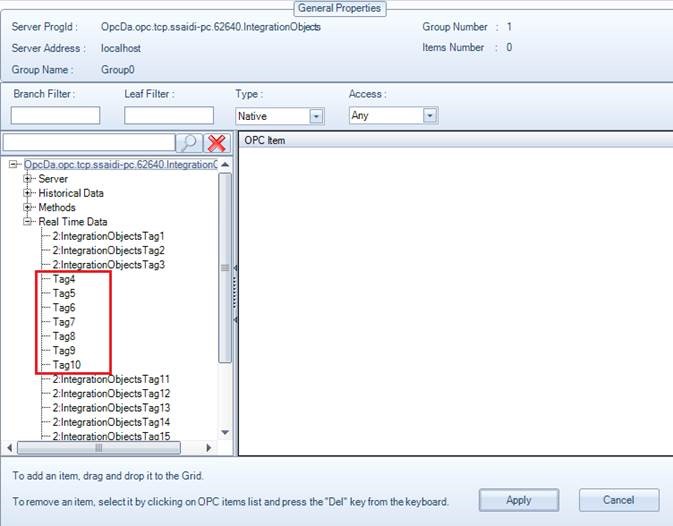
- Now, connect to your proxy using your OPC Classic Client, add group and then add items. The items will be displayed using the configured alias names, as illustrated in the example below:
To disable the alias option:
-
- Verify that the OPC UA COM Proxy Server process is not running from your task manager
- Select the configured proxy
- Uncheck the “Use Alias” option
- And click save
The Value Behind Tag Aliases
Tag aliases offer benefits that go far beyond convenience.
- Faster troubleshooting across units and teams
- Clearer training and onboarding
- Reduced human error in daily operations
- More consistent naming standards across the plant
- Stronger documentation quality
- Smoother collaboration between OT, maintenance, and engineering teams
When a technician reports an issue with Pressure_Line5_East instead of a cryptic node ID, the response team immediately knows what to investigate.
Tag aliases also support the wider migration journey from OPC Classic to OPC UA. As plants modernize, tools like OPC UA Wrapper help teams move step by step while maintaining interoperability and operational continuity.
Take the Next Step
Ready to simplify your OPC UA setup and improve operator efficiency?
Download your free trial of OPC UA Wrapper and start creating intuitive tag names that transform the way your plant navigates data.