What is OPCNet Broker®?
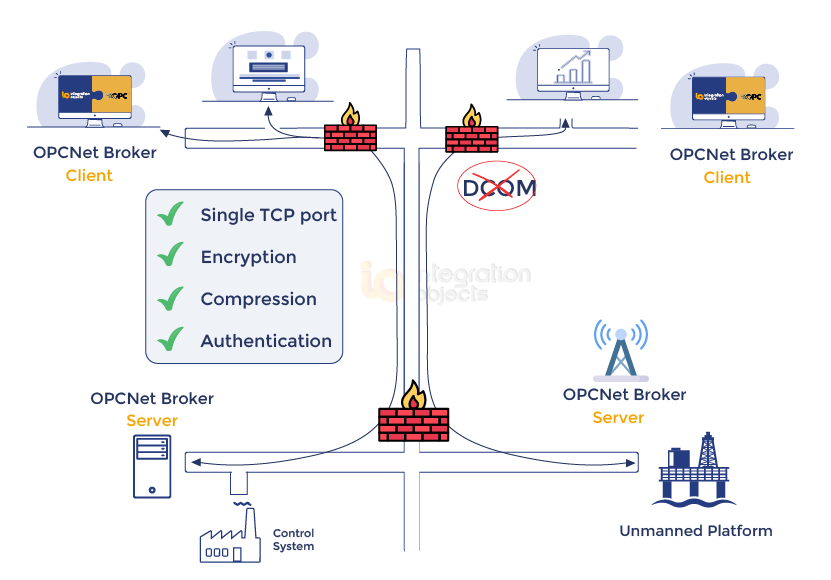
Integration Objects’ OPCNet Broker® product is our OPC tunneler used to ensure fast, robust and secure remote OPC communications using a single TCP port. It enables networked OPC systems to access real-time data‚ historical data, alarms and events without the usual frustrations involved with DCOM configuration and security vulnerabilities. If you tired of DCOM issues complicating connectivity between your OPC systems, download OPCNet Broker® from here and get started on your configuration following the procedure below.
Configure OPCNet Broker®
OPCNet Broker® (ONB) product includes 2 main software components:
- ONB Server Side to be installed on the OPC Server machine.
- ONB Client Side to be installed on the OPC Client machine.
Follow the detailed instructions below on how to install and configure ONB:
- In the OPC Server machine:
- Copy the downloaded package onto the OPC Server machine.
- Unzip the package:
- Use the ONB Server setup in the .Net Framework version 4.0 subfolder for Windows Server 2022, Windows Server 2019, Windows Server 2016, Windows Server 2012, Windows Server 2008, Windows 7, Windows 8, Windows 10 and Windows 11 operating systems.
- Use the ONB Server setup in the .Net Framework version 2.0 subfolder for Windows Server 2003 and Windows XP operating systems.
- Verify that you have the selected .Net framework version installed in the target machine.
- Right click on the ONBS setup executable and select “Run as administrator” from the displayed menu.
- Let the Install Wizard guide you through the installation.
- Configure the ONB Server service to run with a user account that has access rights to connect to and read data from your OPC Server. To do so:
- Open Windows services.
- Locate the “Integration Objects OPCNet Broker Server” service.
- Right click on it and select “Properties” from the displayed menu.
- Go to the “Log on” tab and configure the adequate user account under “This account” option. This user account needs to have privileges to connect to your OPC Server and read data as well as read/write access rights to the ONB installation folder and to the Windows registry.
- Start the “Integration Objects OPCNet Broker Server” service.
- In the OPC Client machine:
- Copy the downloaded package onto the OPC Client machine.
- Unzip the package:
- Use the ONB Client setup in the .Net Framework version 4.0 subfolder for Windows Server 2022, Windows Server 2019, Windows Server 2016, Windows Server 2012, Windows Server 2008, Windows 7, Windows 8, Windows 10 and Windows 11 operating systems.
- Use the ONB Client setup in the .Net Framework version 2.0 subfolder for Windows Server 2003 and Windows XP operating systems.
- Verify that you have the selected .Net framework version installed in the target machine.
- Right click the ONBC setup executable and select “Run as administrator” from the displayed menu.
- Let the Install Wizard guide you through the installation.
- Right click on the ONB Client configuration Tool shortcut and select “Run as administrator” from the displayed menu.
- Click “ONB Connection” on the menu, then select “Add” from the displayed list.
- Enter the ONB Server IP address as illustrated below:
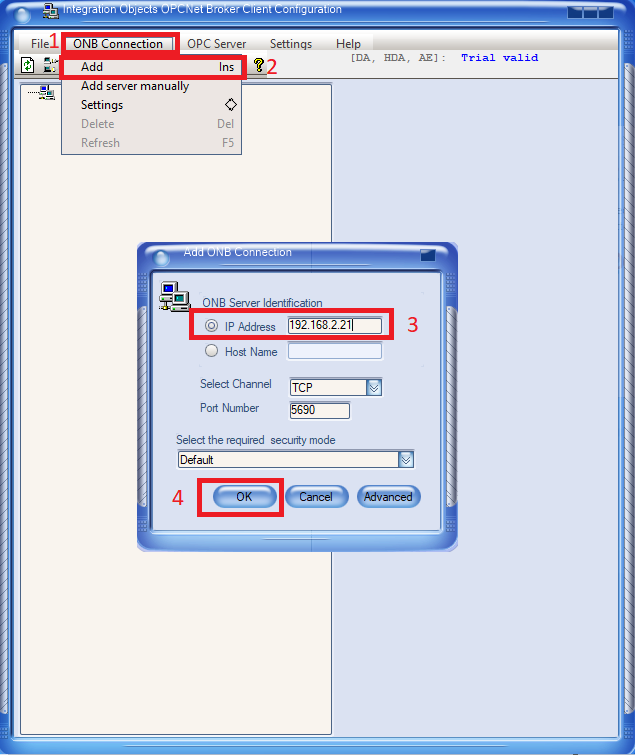
Figure 1: Add ONB Connection
- Click the “OK” button to add all OPC Servers available on the ONBS machine and register them in the ONBC machine.
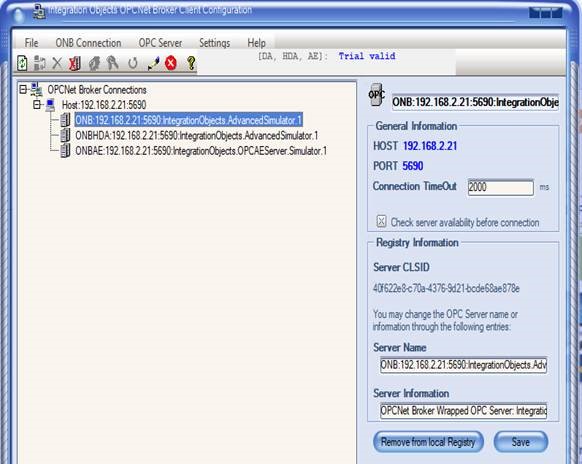
Figure 2: Added ONB Connections on the Client Side
- Configure your firewall to open the ONB TCP port between your client and server machines.
- Open your OPC Client, then browse your local OPC Servers and locate the entries created by the ONB Client when adding your ONB connection. These should have format illustrated in the example below.
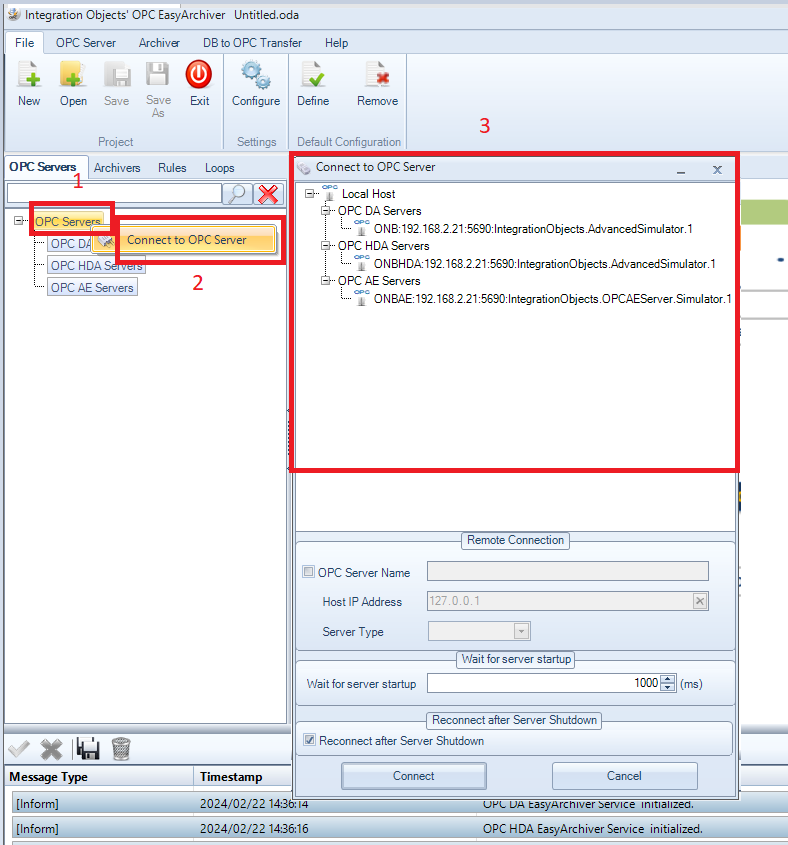
Figure 3: OPC Client Connected to OPC Server via ONB