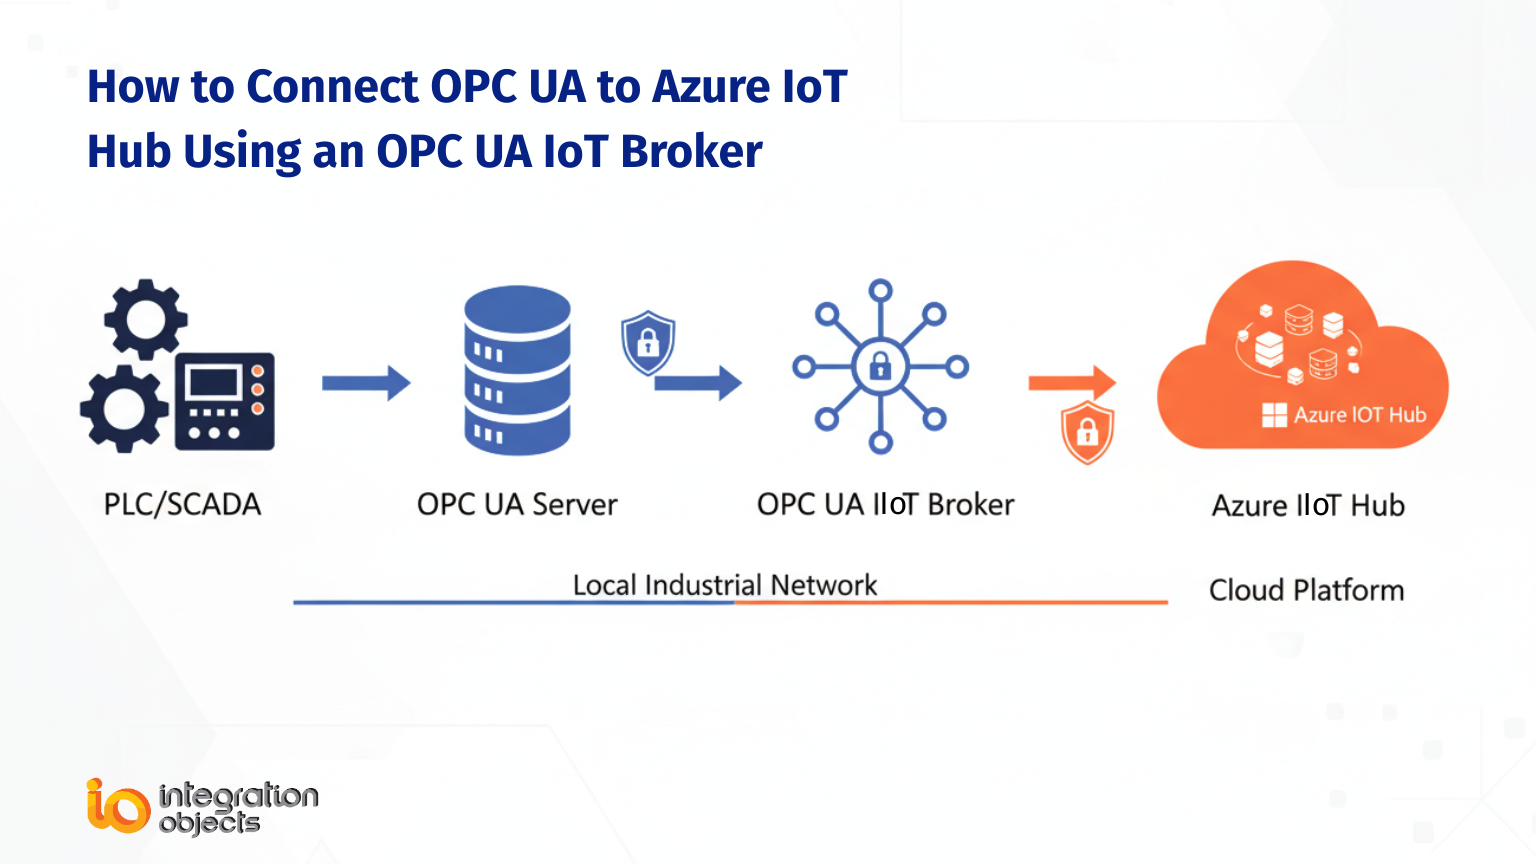
Our OPC UA IoT Broker is an industrial middleware solution that enables OPC UA to Azure IoT Hub integration by collecting real-time data and alarms from OPC UA servers and publishing them securely to Microsoft Azure
Look for more options to transfer Data to the Cloud? Check our our Smart IoT Highway -SIOTH®
Integration Objects’ OPC UA IoT Broker is an innovative solution designed to collect real-time data and alarms & events from OPC UA servers and publish those data to Microsoft Azure IoT Hub in a secure way.
This tutorial provides a step-by-step procedure on how to publish data to Azure IoT Hub using OPC UA IoT Broker. The main steps are:
1. Download and install the OPC UA IoT Broker
2. Configure the OPC UA IoT Broker to connect to the OPC UA Server
3. Configure the OPC UA IoT Broker to connect to Azure IoT hub
4. Configure a new mapping and start publishing data.
5. Monitor your data flow.
These steps are detailed below:
1. Download and install OPC UA IoT Broker
Download the OPC UA IoT Broker from here
Run the downloaded setup using an administrator account and the installation wizard will take through the different steps.
2. Configure the OPC UA IoT Broker to connect to the OPC UA Server
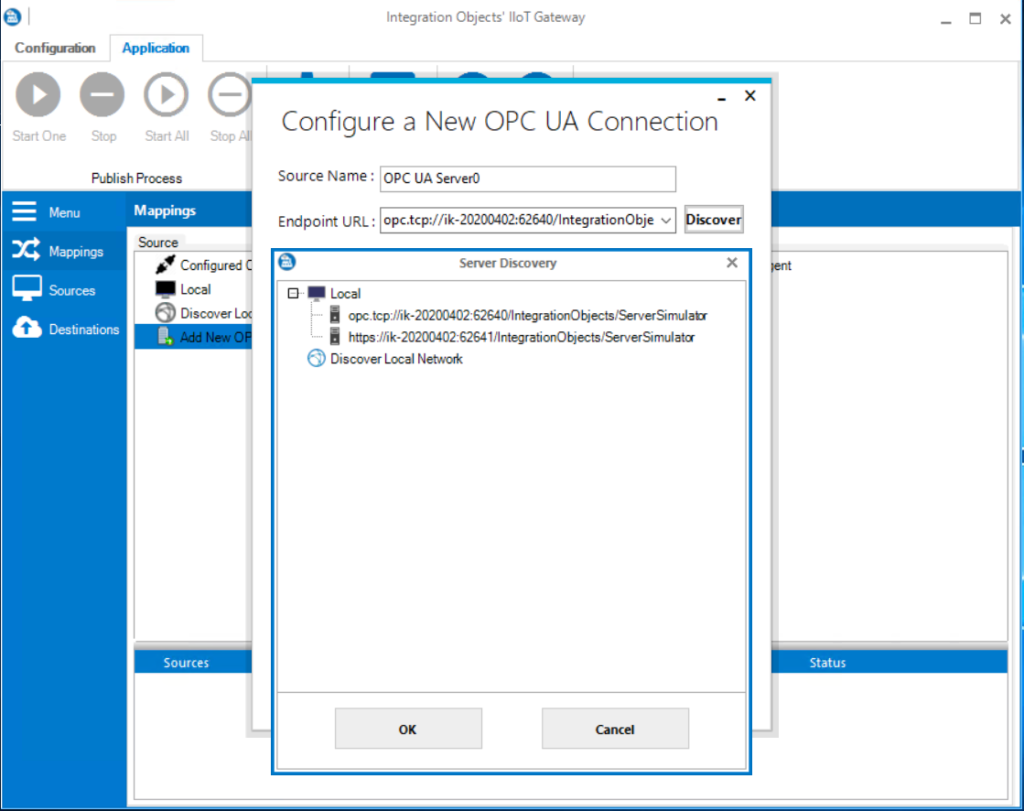
- Open the OPC UA IoT Broker configuration tool from your desktop shortcut
- Click on “Add New OPC UA connection” option under the “Source” tab.
- Enter a Source Name for your OPC UA server.
- Copy and paste the OPC UA Server end point URL or click the “Discover” button, as illustrated in the figure below:
End point URL Discovery
3. Configure the OPC UA IoT Broker to connect to Azure IoT hub
Identify the connection string to your Azure IoT Hub as follows:
If you do not yet have access to the Azure portal, you can create a free Azure account here.
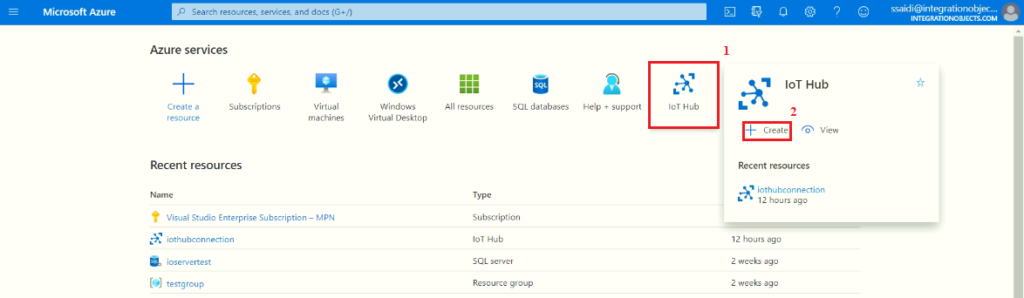
a. Login to the Azure Portal with your account.
b. Create a new resource with “IoT Hub” as type.
IoT Hub Service
c. Choose a resource group (1), name the IoT Hub (2) then finalize your configuration after review (3):
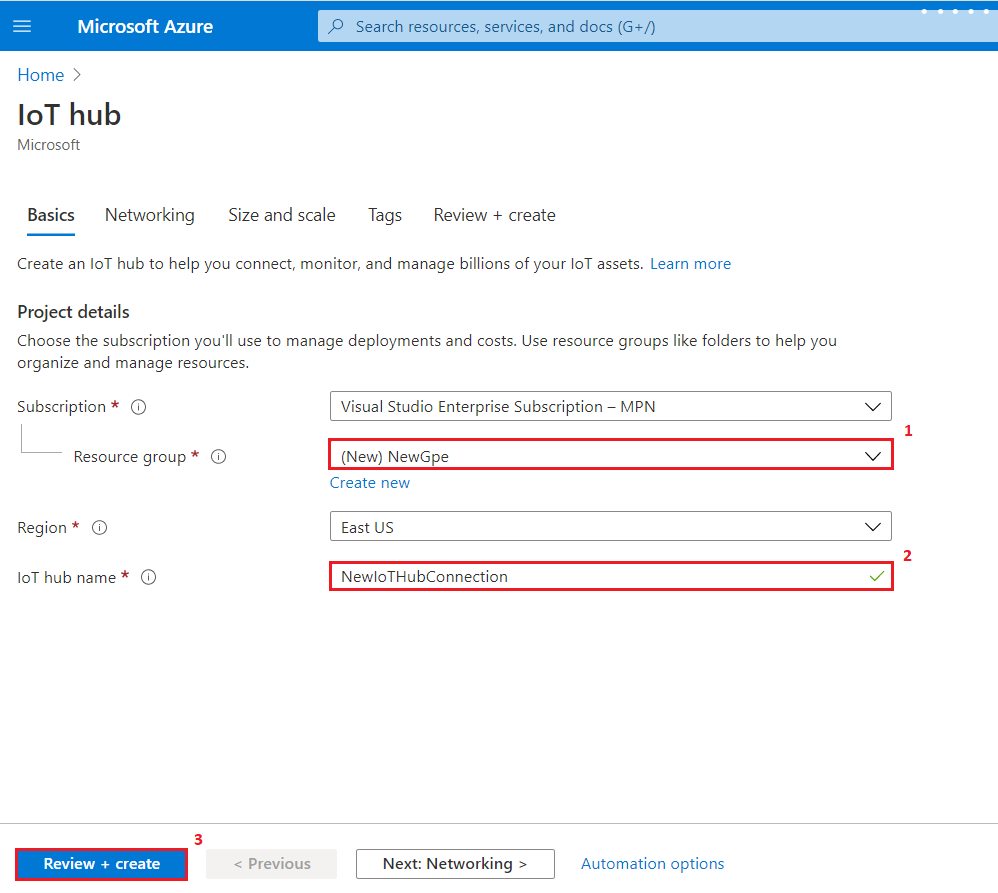
Azure IoT Hub creation
d. Select the newly created IoT Hub under “All Resources” and select the “Shared Access Policies”(1) then choose “iothubowner”(2)
e. Copy the “Connection string – Primary key”(3) from the “iothubowner” policy:
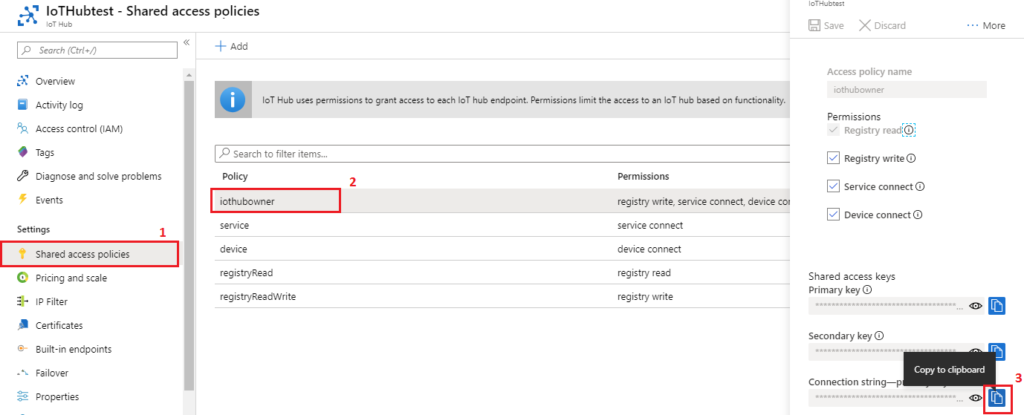
Connection string – Primary key
Add a New Publisher Agent in the OPC UA IoT Broker
a. Click the “Add New IoT HUB Agent” button from the Destination Tree View (1). The following wizard will be prompted:
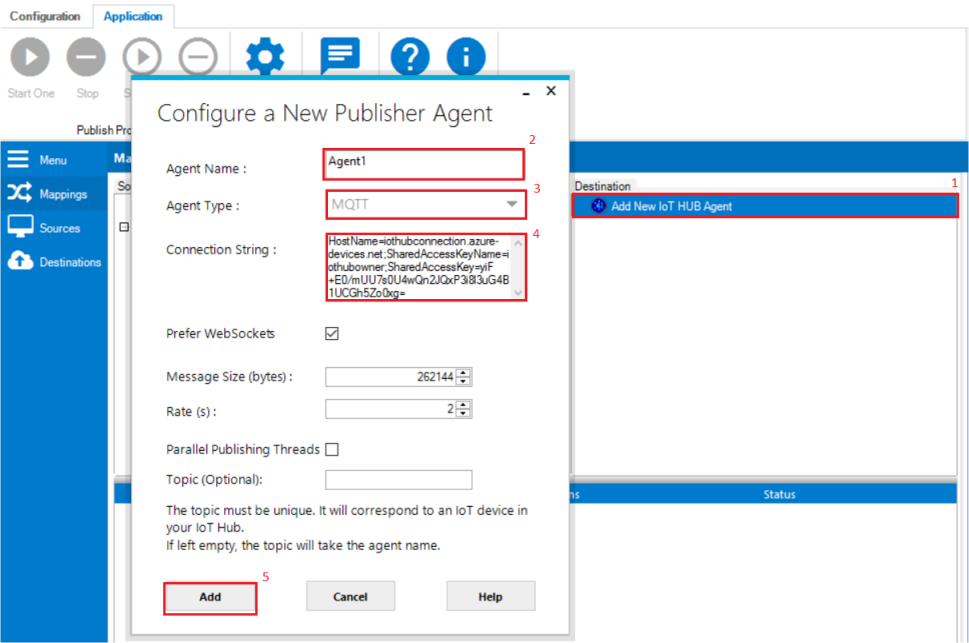
IoT Hub Agent Creation
b. Rename the new publisher agent (2).
c. Choose the Agent type (3) for your IoT Hub agent which presents the protocol used to establish secure communication channel with the IoT Hub. The communication protocol can be MQTT, AMQP or HTTP.
d. Paste the connection string copied in step 1-e into the Connection String field (4).
e. Click the “Add” button (5).
4. Configure a new mapping and start data publishing:
Configure Mapping
- You can configure a mapping by choosing one of the options below:
- Drag an OPC UA Server address space node and drop it on an IoT Hub agent node
- Drag an OPC UA Server address space node and drop it on the mapping grid. You will be prompted to configure the corresponding IoT HUB Agent.
- Drag an IoT Hub Agent and drop it on the mapping grid. You will be prompted to configure the corresponding OPC UA Server.
- Select an OPC UA address space node or tag node (1) and an agent (2) then click the mapping button (3), as illustrated in the figure below:
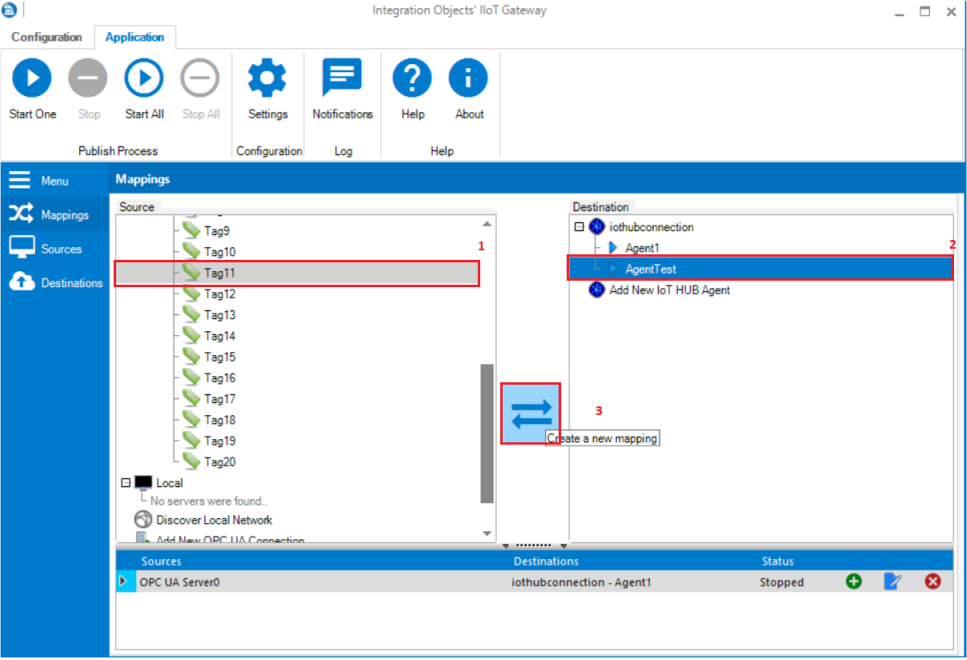
Configuring A New Mapping
- You will be asked whether to send Alarms & Events data along with real time data to the IoT Hub or not.
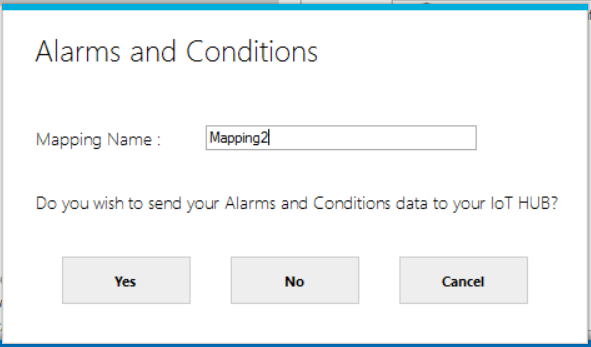
Alarms and Conditions
- Refer to the Mappings Grid that will contain your configured mappings and the status of their corresponding publishing process. You will be able to manage your mappings by clicking the edit or remove buttons of a specific row in the grid.

Mappings Grid
Start Publishing Service
You can start sending your OPC UA DA and AE data to your IoT Hub as follows:
a. Select a mapping from the “Mappings Grid” (1)
b. Click the “Start One” button (2) available in the Application menu bar. Once the service is started, the mapping status in the grid will be updated from “Stopped” to “Started”.
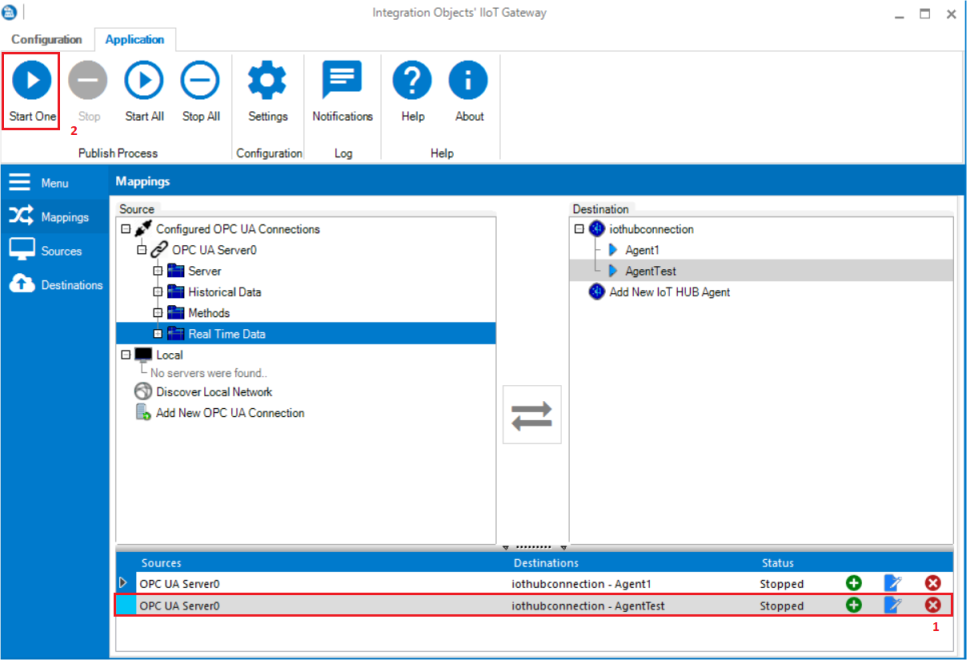
Start Publishing
c. If the publishing process started correctly, a log message confirming that the subscription to the server was created will be displayed in the notification panel as shown in the figure below
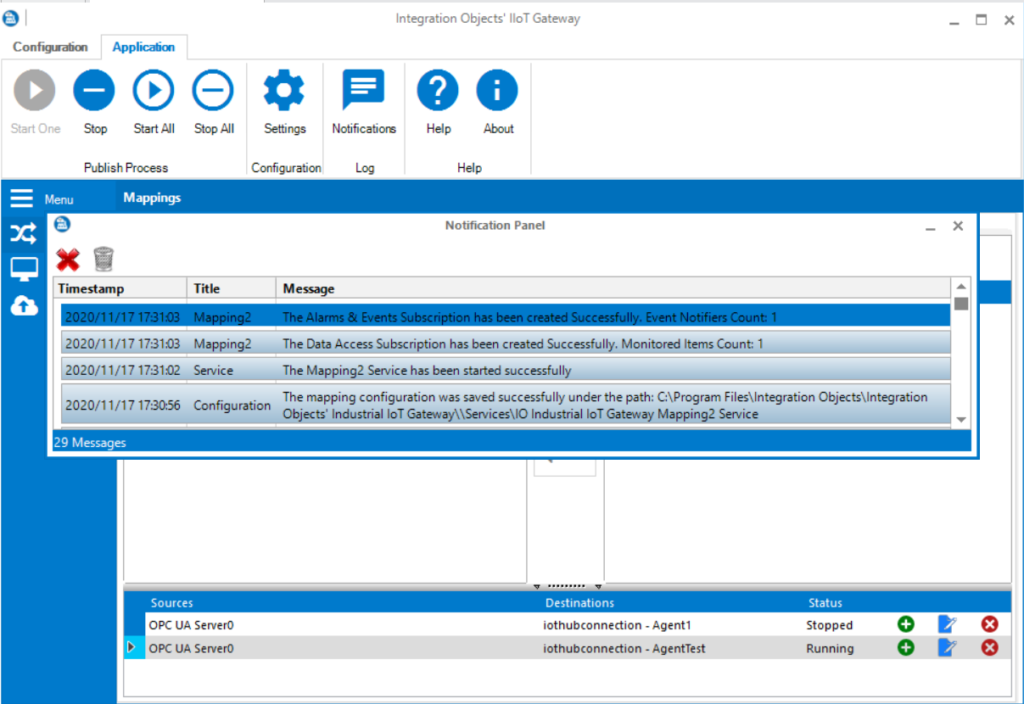
Notifications Panel
5. Monitor your data flow
You can verify the data received from your OPC UA Server and published to Azure IoT Hub using the “Device Explorer” tool for example. This tool can be downloaded from here.
a. In Device Explorer, under configuration menu tab (1), paste the connection string of your IoT Hub (2) , enter the right hostname(3) then click the button “Update”(4), as illustrated below:
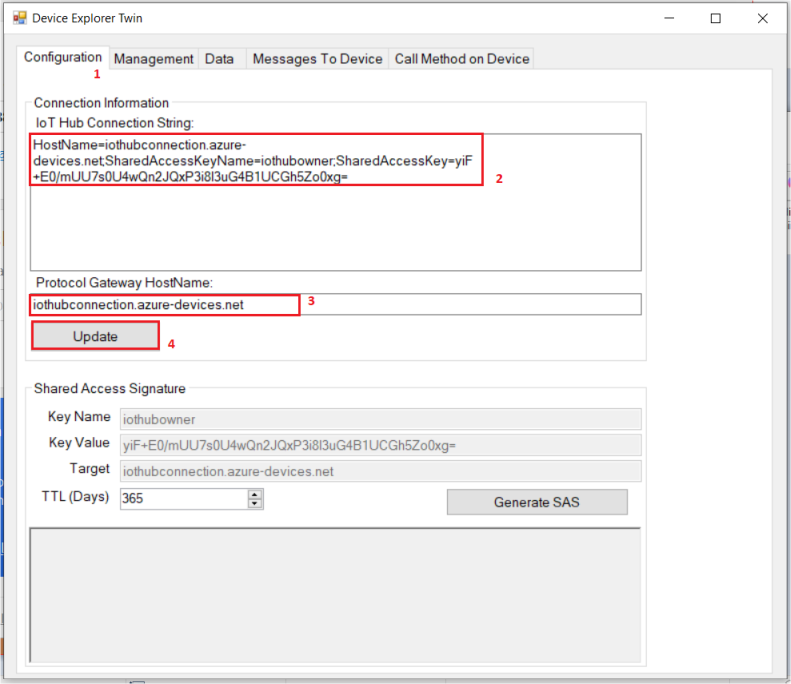
Configuring IoT HuB Connection in Device Explorer
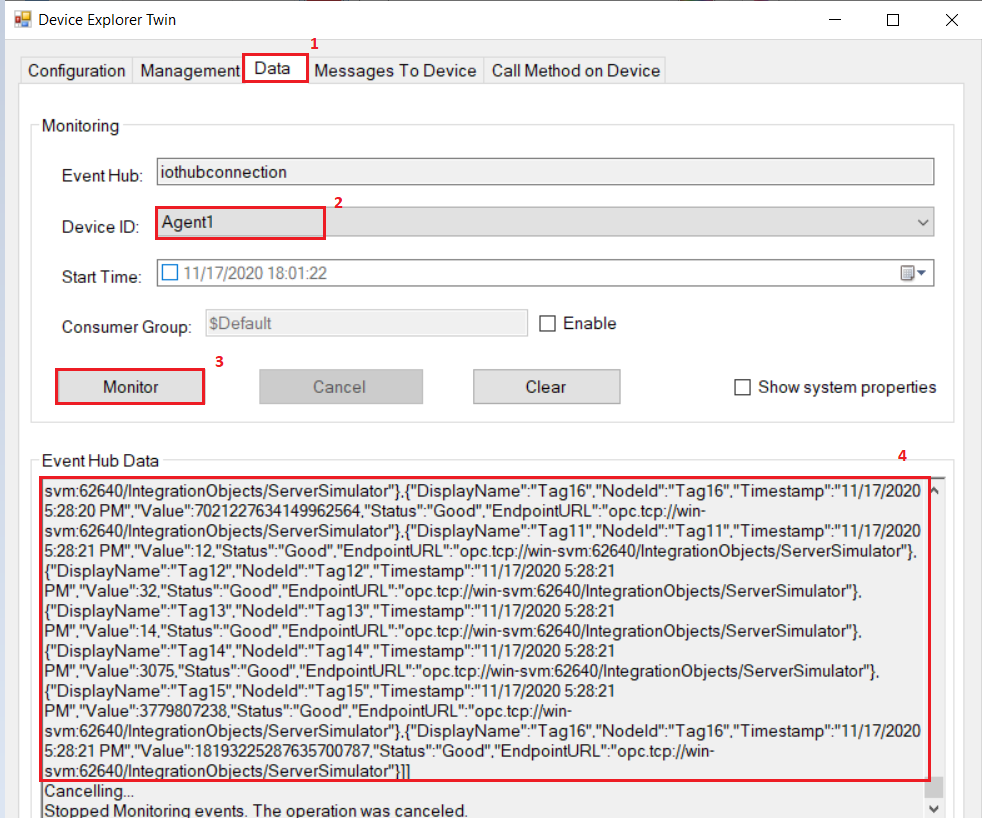
b. View the Data flow: under Data menu tab (1), choose your Agent that was configured and started in the OPC UA IoT Broker (2) and click “Monitor”(3). The published data will then be displayed (4), as illustrated below:
Monitor Data flow